How to Install Paint Protection Film: A Step-by-Step Guide
Navigating the world of auto maintenance can seem complicated, but we're here to make it easier. One of the most beneficial upgrades you can make to prolong the appearance and resilience of your vehicle is adding a layer of Paint Protection Film (PPF). Far from being intimidatingly technical, this process can be completed by even novice car enthusiasts with the right resources.
In this post, we're breaking down the mystery barrier and laying out a simple step-by-step guide on how to install paint protection film yourself. Say goodbye to those annoying chips and scratches that spoil your car's sparkling finish, and let's get hands-on together!
Preparing the Vehicle for Installation
Before diving into the process of installing paint protection film, it's crucial to ensure that the vehicle is properly prepared. This step sets the foundation for a successful installation and ensures optimal adhesion and longevity of the film. Let's explore the important aspects of preparing the vehicle:
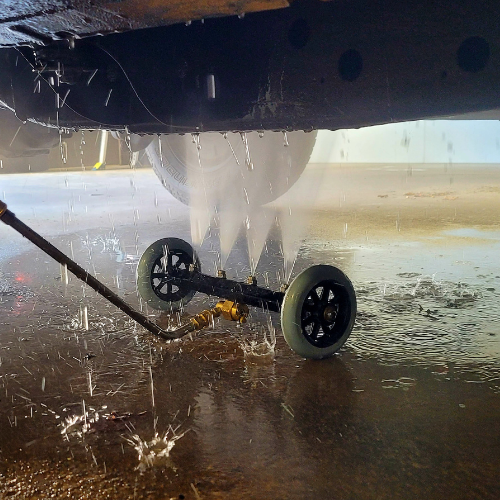
Firstly, it's essential to thoroughly wash and clean the entire exterior surface of the vehicle. This removes any dirt, debris, or contaminants that may hinder the adherence of the paint protection film. Use a mild automotive detergent and a microfiber wash mitt to gently clean the surface, paying close attention to areas prone to accumulation, such as wheel wells and crevices.
Once cleaned, make sure to dry the vehicle completely using a microfiber towel or an air blower. Moisture trapped under the film can cause bubbling or adhesion issues, so ensuring a dry surface is crucial.
Next, inspect the vehicle for any existing damage, such as scratches, dents, or chipped paint. It's vital to address these prior to installation, as they can affect how well the paint protection film adheres and performs. If necessary, perform any necessary repairs or touch-ups before proceeding.
Imagine you spot a small scratch on your vehicle's hood during inspection. Ignoring it could result in an uneven appearance once the paint protection film is applied. Taking the time to fix it beforehand ensures a flawless end result.
After addressing any existing damage, it's time to prepare specific areas that require extra attention. This includes areas with complex contours or edges where precise trimming will be necessary. Gently remove or loosen any parts or accessories that might obstruct proper installation, such as emblems or trim pieces.
Additionally, consider performing a light polish on the painted surfaces. This helps ensure that any minor imperfections or blemishes are smoothed out before applying the protective film. However, exercise caution when using polishing compounds, as excessive force or incorrect technique can cause more harm than good.
Lastly, as a precautionary measure, use isopropyl alcohol or a specialized surface preparation solution to carefully wipe down the areas where the film will be applied. This step removes any residual oils or wax that may interfere with adhesion and helps create a clean surface for optimal bonding.
With the vehicle properly prepped, you're now ready to move on to the next crucial step: the necessary surface preparations.
Necessary Surface Preparations
Proper surface preparation plays a pivotal role in achieving a flawless installation of paint protection film. These necessary steps ensure optimal adhesion and minimize the risk of any imperfections beneath the film. Let's explore these essential surface preparations:
Firstly, carefully inspect the vehicle's surface for any tiny particles or contaminants that could compromise the installation. This includes dust, lint, or small fibers that may have settled since cleaning. Use a compressed air blower or specialized detailing brushes to remove these particles meticulously. Avoid touching the surface with bare hands, as this may transfer oils or fingerprints.
Next, utilize an automotive clay bar to remove any embedded substances such as tree sap, tar, or road grime. Apply a lubricant, such as quick detailer spray or soapy water, to enhance clay bar movement and gently glide it across the painted surface. The clay bar effectively lifts these contaminants off the paintwork and ensures a smooth and pristine finish.
Once the surface is thoroughly clean and free from contaminants, it's important to ensure that the environment is suitable for the installation. Choose a well-ventilated area with low humidity levels to prevent issues like condensation under the film. Ideally, work in a controlled environment like a garage that protects against dust or debris.
Imagine performing the installation on a hot, humid day without proper ventilation. The excess moisture in the air could lead to improper adhesion, compromising the protective qualities of the film.
Before proceeding with paint protection film installation, carefully review the manufacturer's instructions and recommendations. Different films may have specific requirements regarding surfaces, temperatures, or application techniques. Adhering to these guidelines ensures optimal results and the longevity of the film.
With all these necessary surface preparations completed, you're now ready to move forward with applying the paint protection film to your vehicle. This step-by-step guide will provide you with detailed instructions on how to achieve a professional-looking installation.
Paint Protection Film Application
Applying paint protection film (PPF) to your vehicle is a worthwhile investment in preserving its pristine appearance and protecting it from everyday wear and tear. This transparent, adhesive film acts as a shield against scratches, rock chips, and other minor damages that can occur on the car's paint surface. To ensure a successful application, several key factors need to be considered.
First and foremost, thorough preparation is vital. Begin by thoroughly washing and drying your vehicle to remove any dirt or debris that may interfere with the film's adhesion. It's also crucial to take note of any existing imperfections on the paintwork, like swirl marks or scratches, as these should be rectified before applying the film. A smooth and clean surface will contribute to achieving optimal results.
Next, make sure you have all the necessary tools and equipment ready for the application process. This typically includes a squeegee, heat gun, or blow dryer; masking tape; a razor blade or knifeless tape; and a spray bottle filled with water mixed with a small amount of soap or slip solution. Having these items readily available will make the installation process more efficient.
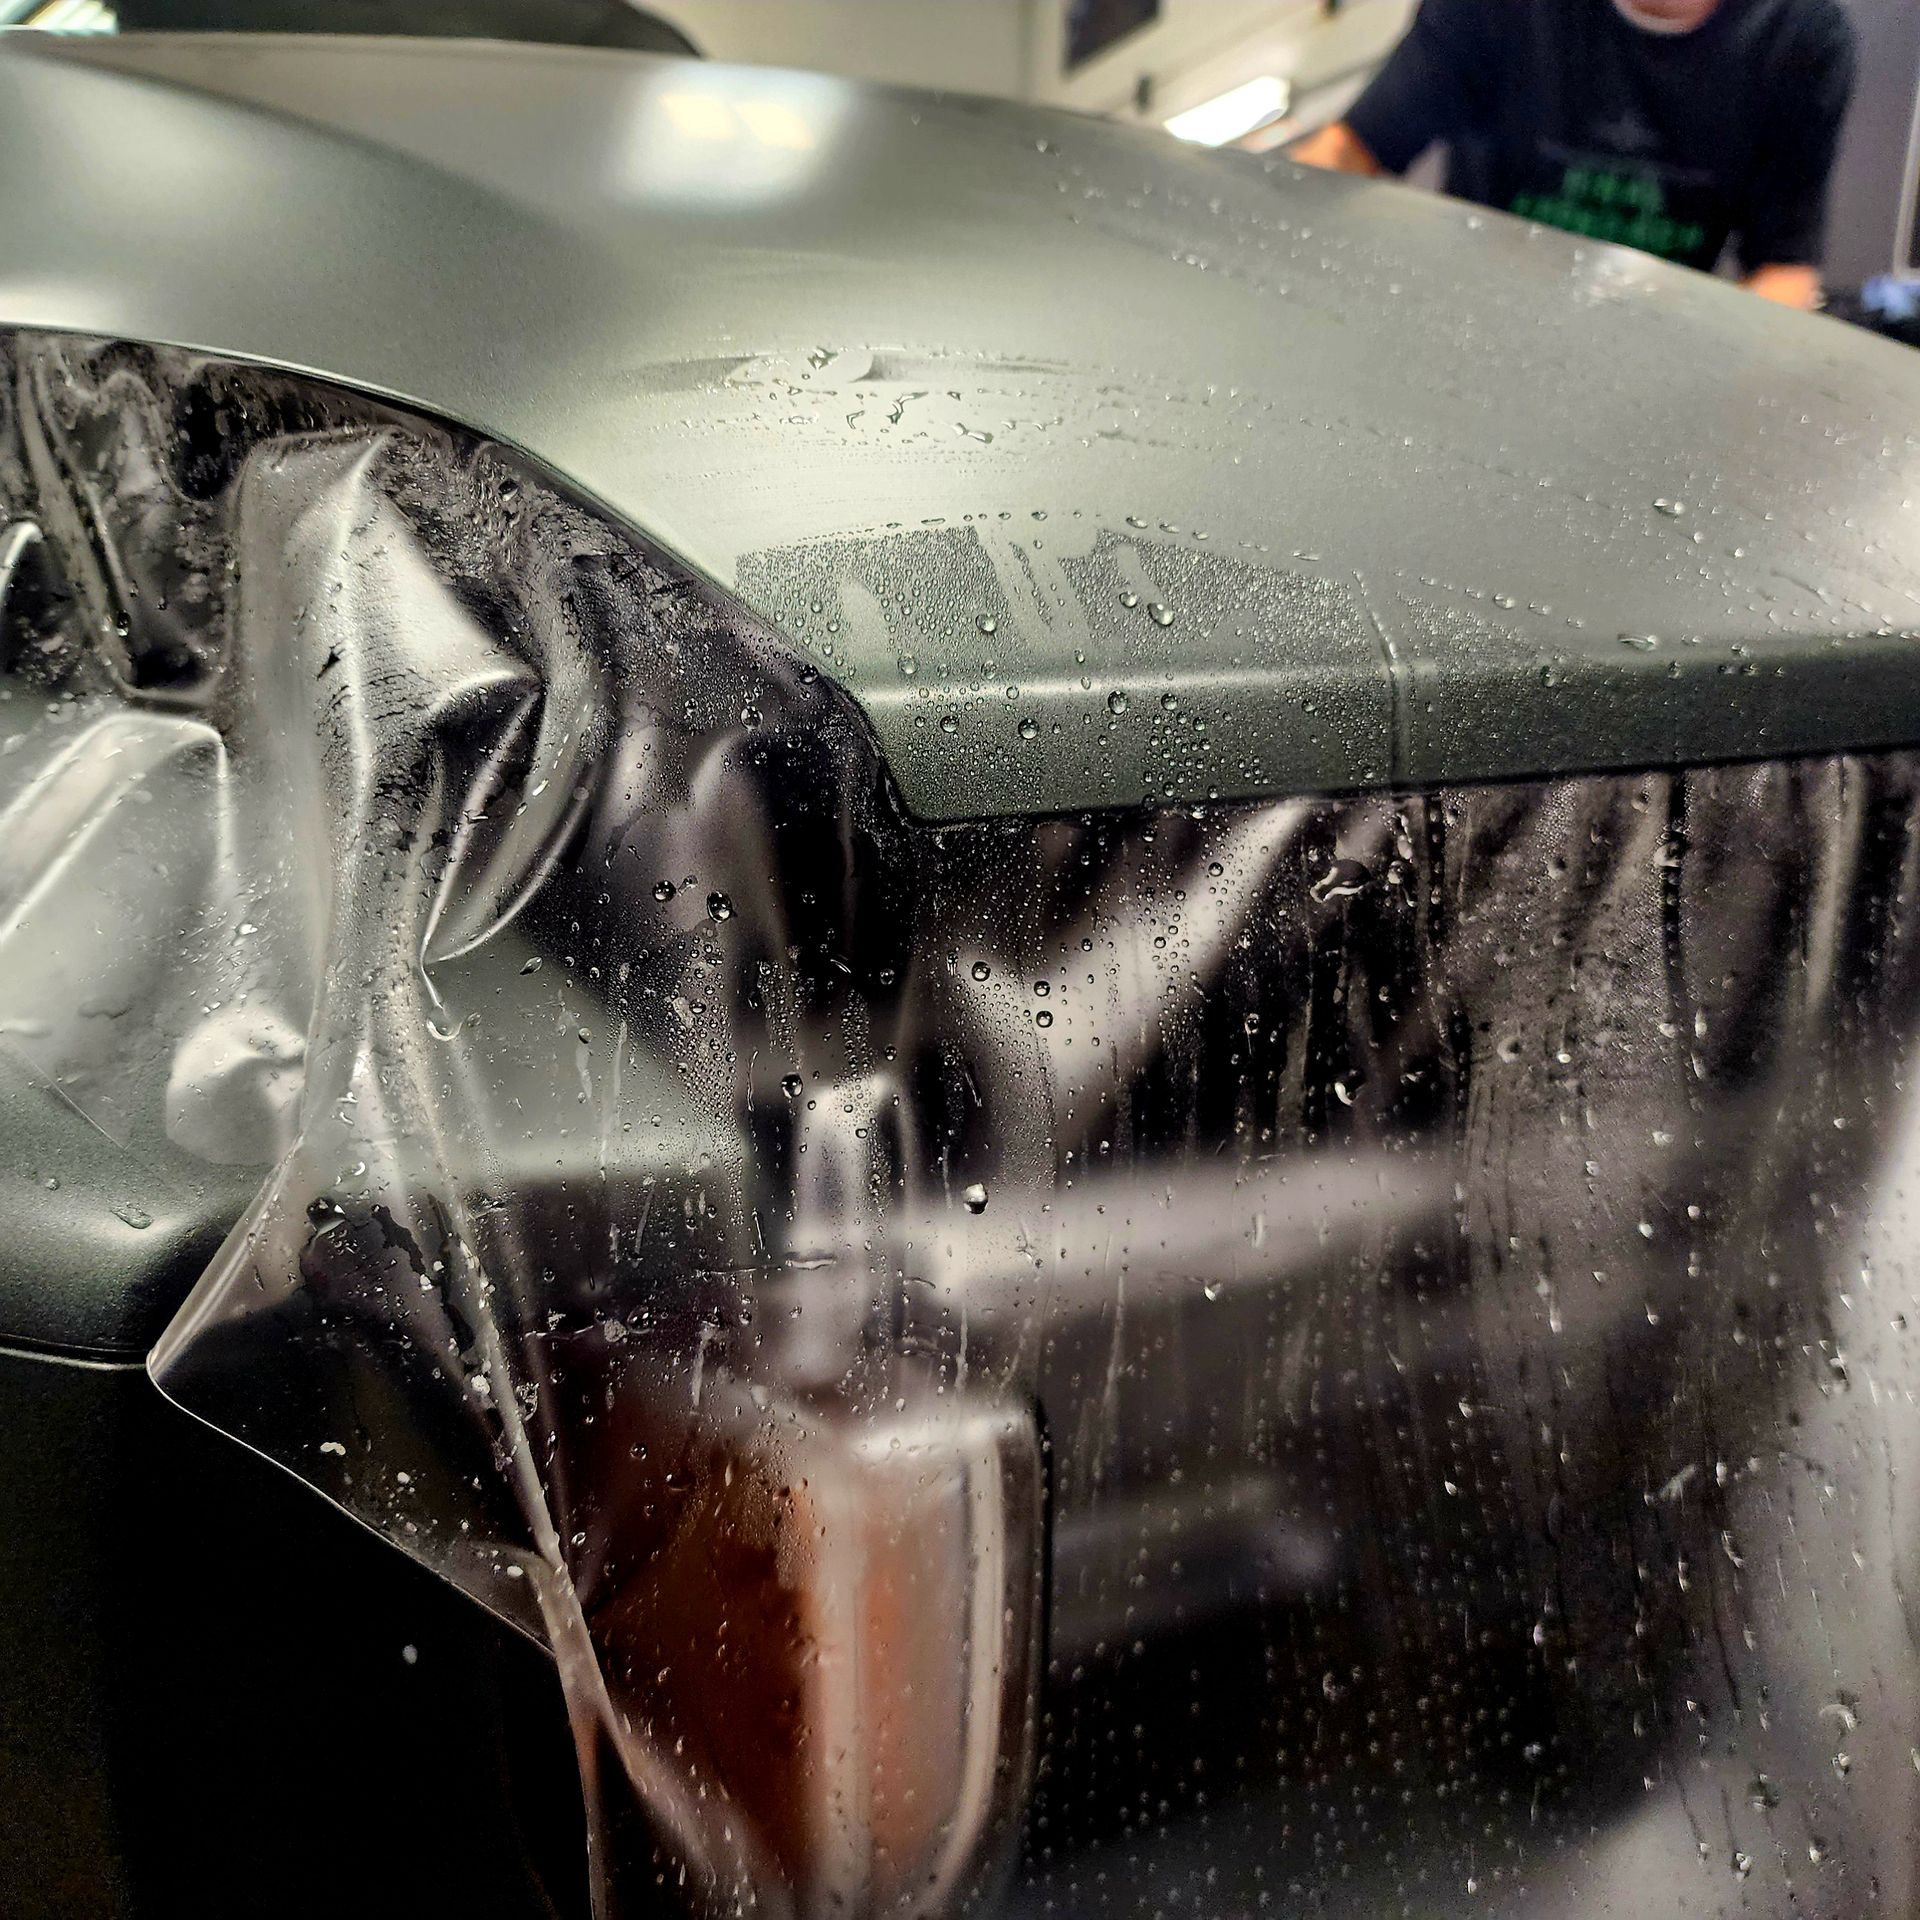
Let's say you're applying paint protection film to your vehicle's hood. Start by positioning the precut piece of PPF over the hood surface while ensuring it aligns properly with the edges. Spray the hood surface with the soap-water solution to provide lubrication for repositioning if necessary.
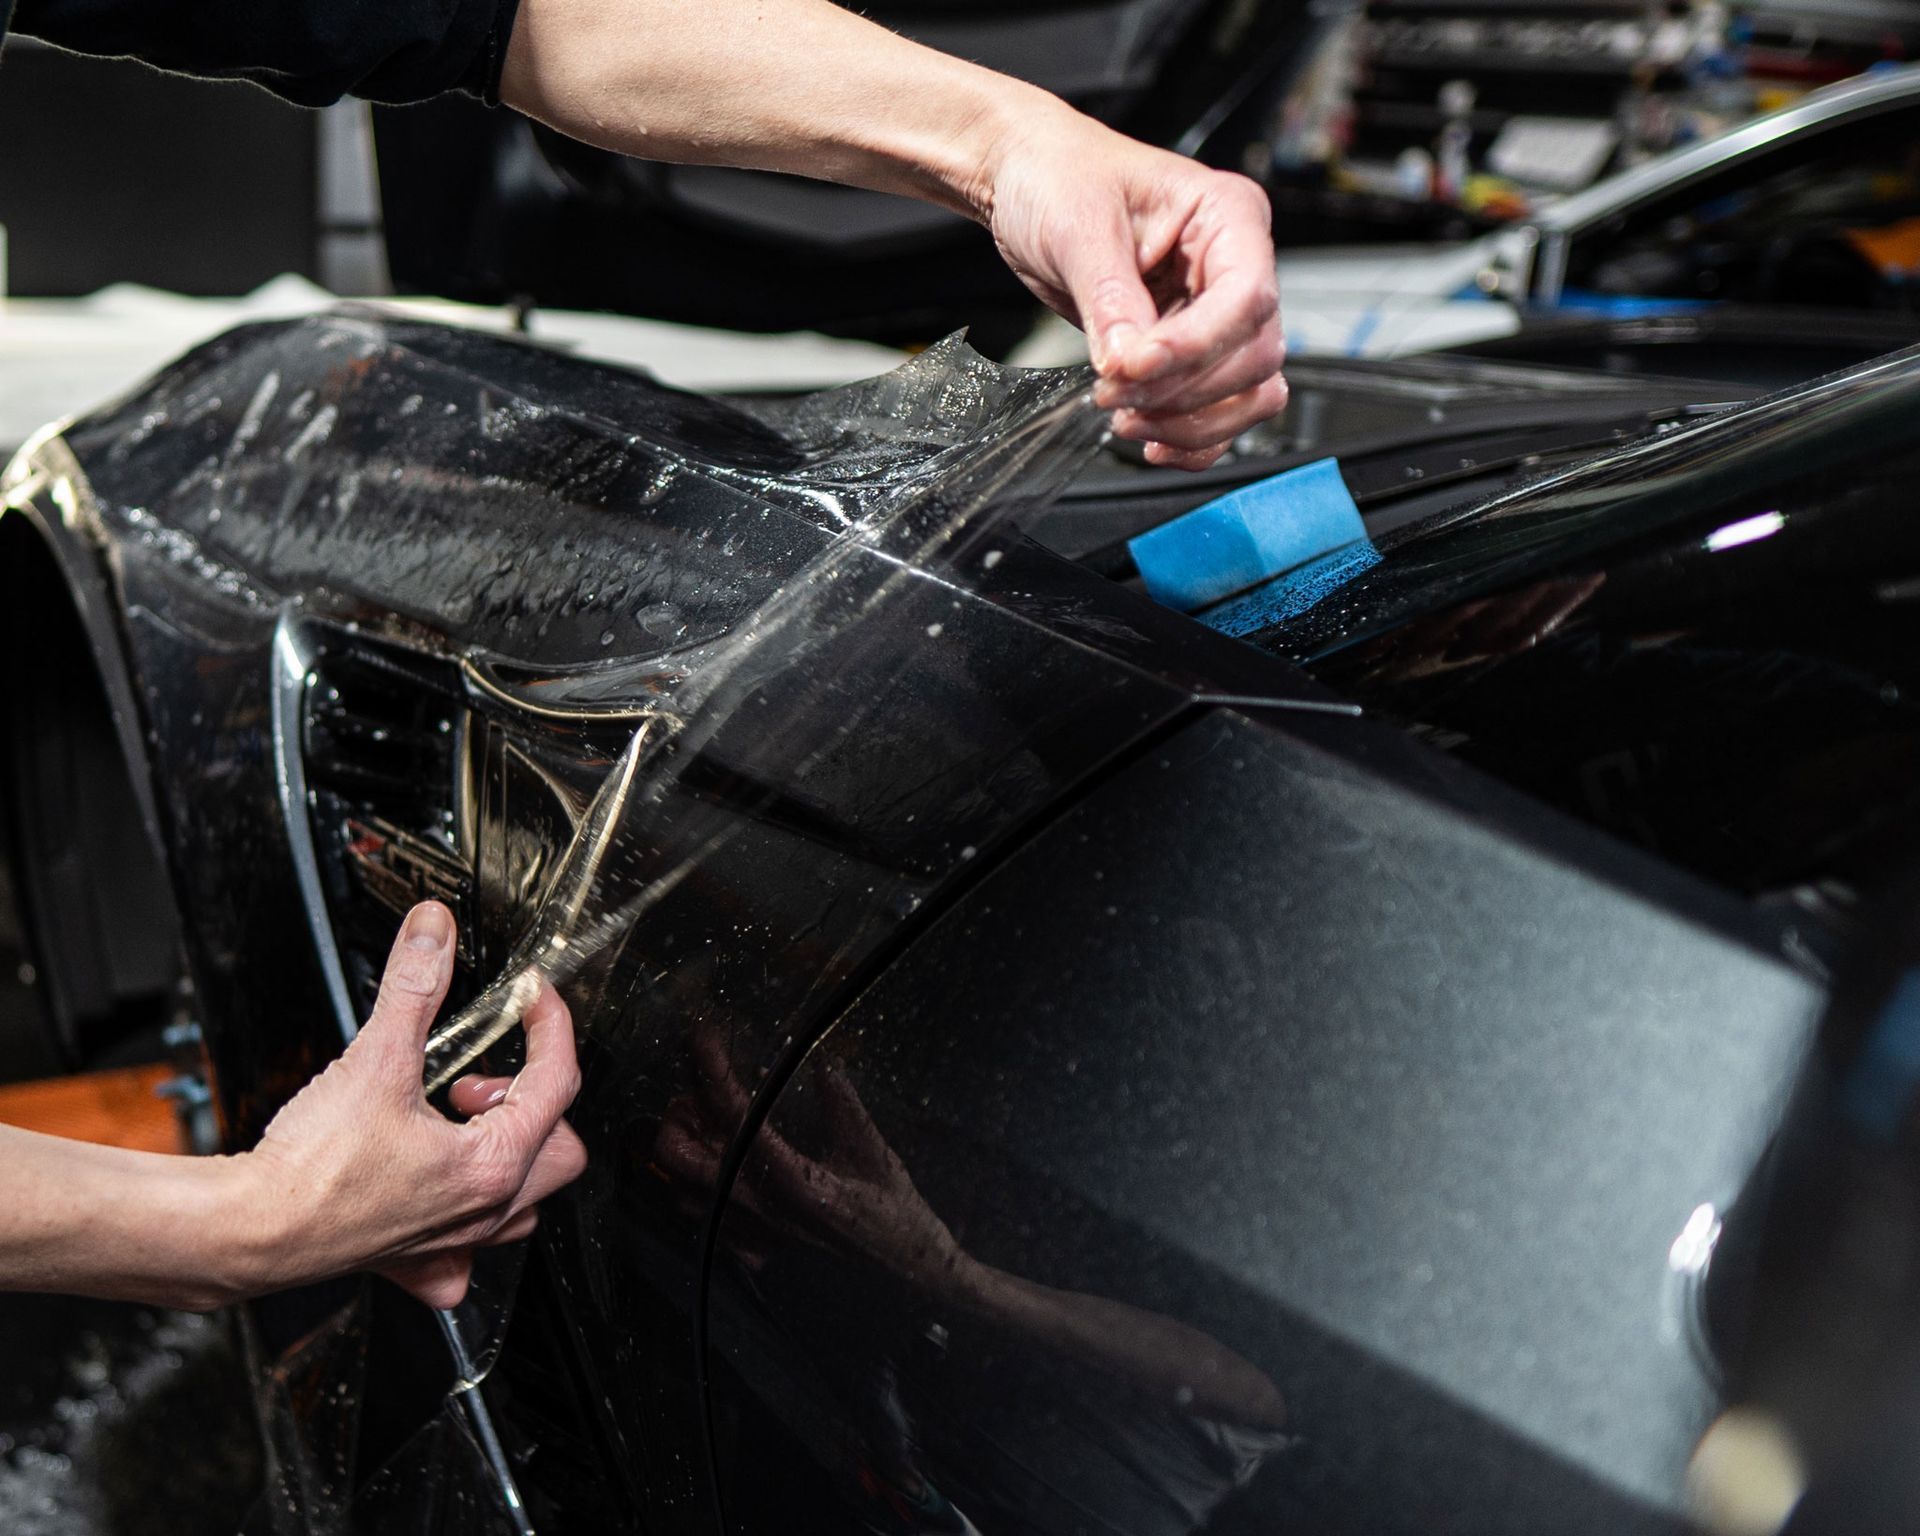
Once positioned correctly, gently peel off a small portion of the backing from one edge of the film. As you gradually expose more of the adhesive side, use your squeegee to firmly press down on the film while simultaneously removing any air bubbles that may form underneath. Work slowly from one edge to another until the entire PPF piece is securely adhered to the hood.
It's essential to take your time during this step, using even pressure and smooth strokes with the squeegee to avoid creases or wrinkles. If any air bubbles persist, you can use the heat gun or blow dryer on a low setting to warm the film slightly and aid in their removal with the squeegee.
After successfully applying the PPF to one section, repeat the process for other areas of your vehicle, such as the front bumper, fenders, or side mirrors. Take care to always align the precut film properly and eliminate any air bubbles along the way. Patience and attention to detail are key factors in achieving professional-looking results.
Guided Step-by-Step Process
To help you navigate through the application of paint protection film (PPF) effectively, here is a step-by-step guide that will enable you to achieve professional results:
- Preparation: Begin by thoroughly washing and drying your vehicle, paying special attention to removing any dirt or debris from the surface that may affect adhesion. Repair any existing imperfections, such as swirl marks or scratches, before proceeding.
- Gather Tools: Ensure you have all the necessary tools and equipment ready for installation, including a squeegee, heat gun or blow dryer, masking tape, razor blade or knifeless tape, and a spray bottle filled with a soap-water solution.
- Positioning: Carefully position the precut piece of PPF over the target area of your vehicle while ensuring it aligns correctly with the edges. Use masking tape if necessary to hold it in place temporarily.
- Lubrication: Spray the surface area with the soap-water solution to provide lubrication for repositioning if required.
- Application: Gradually peel off a small portion of the backing from one edge of the film. As you expose more of the adhesive side, use the squeegee to firmly press down on the film while simultaneously removing air bubbles with smooth and even strokes.
- Air Bubble Removal: In case air bubbles persist, use the heat gun or blow dryer on a low setting to warm the film slightly and aid in their removal with the squeegee.
- Repeat Process: Continue repeating the application process for other sections of your vehicle, ensuring proper alignment and eliminating air bubbles along the way.
By following this step-by-step process and incorporating patience, attention to detail, and precise execution, you'll be able to achieve a successful paint protection film installation that enhances both the appearance and longevity of your vehicle's paintwork.
Post-Installation Care
Congratulations on installing paint protection film (PPF) on your vehicle! Now that the installation is complete, it's important to follow proper post-installation care to ensure optimal performance and longevity of the film. Here are some essential steps to take:
- Allow Sufficient Drying Time: After the PPF is installed, it's crucial to give it enough time to cure and adhere properly to the vehicle's surface. This typically takes around 24-48 hours, but it's best to consult with your installer for specific recommendations.
- Avoid Washing the Vehicle: During the initial curing period, refrain from washing your vehicle or exposing it to rain. Excessive moisture can hinder the bonding process between the film and the paint surface. If you do need to clean your vehicle, consult with your installer for guidance on when it would be safe to do so.
- Avoid Waxing or Polishing: While PPF provides excellent protection for your vehicle's paintwork, waxing or polishing the film is not recommended. These products contain ingredients that can potentially harm the film or affect its adhesive properties.
- Handle with Care: Treat your PPF with care by avoiding abrasive cleaners or sponges when washing the vehicle. Opt for a gentle touch and use non-abrasive cleaning solutions specifically formulated for automotive finishes.
- Protect against Environmental Factors: PPF is designed to shield your vehicle from environmental hazards such as UV rays, bird droppings, tree sap, and road debris. However, prolonged exposure to these elements can degrade the effectiveness of the film over time. Whenever possible, park your vehicle in shaded areas and avoid parking under trees where bird droppings may be common.
- Inspect Regularly: Periodically inspect your PPF for any signs of damage or peeling edges. If you notice any issues, contact your installer promptly for further assessment and potential repairs.
Remember, each PPF installation may come with specific care instructions based on the brand and type of film used. It's important to consult with your installer or refer to the manufacturer's guidelines for any additional care recommendations.
Maintenance Tips for New Film
Now that your paint protection film is installed and you've followed the initial post-installation care steps, it's time to maintain its pristine condition. Here are some essential maintenance tips to keep your new film looking great:
- Regular Washing: Regularly wash your vehicle using a mild automotive soap and a soft microfiber cloth or sponge. This will help remove dirt, dust, and other contaminants from the film's surface.
- Avoid Harsh Chemicals: When cleaning your vehicle, steer clear of harsh chemicals such as ammonia-based window cleaners or acidic solutions. These can potentially damage the film or affect its appearance.
- Drying Technique: After washing, use a clean microfiber towel or an air blower to dry the vehicle thoroughly. Avoid using abrasive towels or rubbing the film aggressively, as this can cause scratches or swirl marks.
- Careful Wheel Cleaning: Be cautious when cleaning your wheels, especially if they have aftermarket coatings or are prone to brake dust buildup. Some wheel cleaners may contain chemicals that can harm the film, so it's best to opt for a non-acidic and pH-balanced cleaner.
- Avoid Excessive Heat: While PPF is designed to withstand high temperatures, avoid exposing it to excessive heat sources such as hot exhaust pipes or engine components. Prolonged exposure may compromise the integrity of the film over time.
- Professional Inspection and Maintenance: Periodically have your PPF professionally inspected and maintained by certified installers who specialize in automotive films. They can assess the condition of the film, address any potential issues, and provide necessary touch-ups if required.
By following these maintenance tips, you can ensure that your PPF continues to provide excellent protection for your vehicle's paintwork, preserving its appearance and resale value for years to come.
Final Words
As much as DIY PPF installation can be satisfying, professionals such as Final Approach Detailing provide greater expertise and precision than can be attained through DIY efforts alone. Modern vehicles feature intricate contours and curves, which require special care in their installation to achieve factory-like coverage for optimal coverage and an unblemished factory-finish.
Final Approach Detailing stands as a beacon of professionalism and excellence when it comes to PPF installation. Our experienced experts possess both technical knowledge and years of experience to successfully navigate various vehicle models' unique challenges, providing superior protection while giving the peace of mind that comes from knowing a job was executed perfectly. By choosing Final Approach Detailing's services, you're not only investing in superior protection for your vehicle; you're investing in peace of mind as well.
Contact Final Approach Detailing today and elevate the protection of your vehicle to an unsurpassed standard - only professionals can deliver this level of care!